Showing posts with label Snacks. Show all posts

May 15, 2017

Takoyaki


I'm a huge Takoyaki fan, and so got excited to the bone when I finally found a Takoyaki maker last December.  But life got in the way and I never got to try making Takoyaki until today.  I'm very happy to report that it turned out perfectly well, and we wiped out all 32 balls we made from this recipe. :)

TAKOYAKI

What's In It?

Takoyaki Batter

  • 2 sachets Ajinomoto Dashi powder
  • 1/4 cup warm water
  • 2 cups water
  • 1/4 teaspoon salt
  • 1 teaspoon light soy sauce
  • 2 large eggs, or 3 small ones, beaten lightly
  • 1 1/4 cup all purpose flour

Fillings
  • Diced Tako (octopus), about 1/2 cup
  • Finely chopped cabbage, about 1/2 cup
  • 1 bunch green onions, chopped
  • 2 T beni shoga (red pickled ginger), diced finely*
  • 1/2 cup dried alamang (baby freshwater shrimps)*
Cooking oil


Kitchen Conjugations:

1. Make Takoyaki batter by first dissolving the dashi powder into the warm water.  Add in salt and soy sauce.  Pour in 2 cups water, then check seasonings.  Adjust by adding more dashi powder if desired. 

2. Check the dashi stock's temperature, which should be room temp. Slowly stir in the flour alternately with the beaten eggs.  Stir to combine well, ensuring the batter is free of lumps.  Set aside.

3. Plug in and turn the Takoyaki appliance on.  Brush each cavity generously with cooking oil.

4. Pour batter to each cavity to half-full.  Drop a little of each filling into each cavity. Let cook for about 3 minutes.

5.  Using skewers tilt each Takoyaki to check if the batter has cooked. Remove each half carefully, a row each time, and fill the vacated cavities as you have in step 4. Take the cooked Takoyaki halves back to their places, covering the other, still cooking half.  Do the same for the other Takoyaki halves.

6. Tilt the Takoyakis from time to time to ensure even cooking, also to make round them off.  Cook for another 3 minutes or until golden brown.

7. Remove from pan, serve drizzled with Takoyaki sauce and Kewpie mayonnaise (which I didn't have), sprinkled with Katsuobushi (dried bonito flakes, which I didn't have as well--bummer!) and aonori (green seaweed).

Tabemashou! 食べる食べましょう!

Jul 3, 2016

Spicy Floss Bun

Rain, me, coffee and this floss bun. Splendid!

Couldn't believe how much floss is on this one considering it cost only P25.00 each, much less than what one would shell out at BreadTalk.
Hurray for Shopwise bakery!

(Another favorite of mine is their Spanish Bread, which costs only P5.00.  If you're lucky you can get the freshly baked, hot off the oven ones.. so yummy! Or have them warmed for you for free.)

Since I ate my floss bun three days after purchase, I found the bun wasn't as soft as it was. But that 'issue' was quickly resolved  by a few minutes of warming in a preheated oven toaster. :)


Jun 9, 2016

Pizza Muffins


I originally made these pizza muffins as part of the menu for my youngest son's 3rd birthday party in school.
I had wanted something popular with kids, something that's already portioned and easy to distribute, and something that can be in kid portions.

I got the recipe from an issue of Yummy magazine, and tweaked it to suit my taste.

I think these pizza muffins are also good as baon for both schoolers and their parents. :)  It's also a quick snack you can whip up if you have surprise guests, or something your kids can make by themselves. :)

What's In It?

2 cups flour
14 cup sugar
1 tablespoon baking powder
1 teaspoon salt
1 teaspoon Italian seasoning
12 teaspoon baking soda
1 cup cheddar cheese, cubed
1 cup sour cream (1 cup milk with 1 teaspoon vinegar)
2 eggs
14 cup butter, melted
12 cup bell pepper, finely chopped
1⁄2 cup sweet-style pizza sauce
12 cup shredded quickmelt cheese

Toppings: Small slices/bits of Italian Sausage, Salami and Ham


 Kitchen Conjugations:

  1. In a medium bowl, whisk together sour cream, eggs and butter until smooth. 
  2. Add in flour, sugar, baking powder, salt, and baking soda. Stir until all the flour and sugar have dissolved.
  3. Stir in cheese cubes, Italian seasoning and diced bell pepper.
  4. Spoon mixture into muffin cups, until three-fourths full.
  5. Spoon a tablespoon of pizza sauce on top of each muffin, top with shredded cheese and other toppings of choice.
  6. Bake at 200C for 15 to 20 minutes, until golden and a toothpick inserted in the center of the muffins comes out clean. 
  7. Cool on on a wire rack and remove from molds.
Enjoy!


I bought these disposable foil tins from Japan Home, P88 for a pack of 12 tins.

Jun 29, 2012

Maja Mais

I am not sure where this dessert originated, if it's actually Filipino or Spanish. What I know is that it's such a cinch to make, and very cheap too! Great for when you're in a hurry or simply lazy, or when you've been assigned to bring dessert for potluck. :)


What's in it?

2 c thin coconut milk
3/4 c corn kernels
3/4 c washed sugar (segunda)
1/2 c cornstarch
latik or sugar toasted coconut

Kitchen Conjugations:

In a saucepan, dissolve cornstarch in coco milk.  Stir in sugar and corn kernels.  Cook mixture over medium heat, stirring continuously until thickened (but not lumpy).   Remove from fire and pour into molds.  Let cool until set.  Sprinkle latik or toasted coconut bits.

Serve with salabat or tea. Enjoy! :)

Notes:

1. Sugar toasted coconut (green pack in photo) is available in leading supermarkets. But if you have time and energy, feel free to make latik for topping! :D

2.  The original recipe for this (which I got from the cornstarch box), asks for the corn kernels to be pureed in a blender or food processor. I opted not to because doing so will turn the mixture yellow, and I like my maja white. 

Plus, skipping the step saved time, electricity, soap and water for washing the blender/food processor.

3.  I used instant gata powder for this batch (50 g), dissolved in 2 cups filtered water.

4. If you don't like corn, try using macapuno, sweetened langka or ube. :)


Dec 6, 2011

Pichi-pichi with Cheese


I found grated cassava at South Supermarket Alabang which cost only P20.00 per icebag (makes about 2 cups) and made Pichi-pichi.  I didn't have grated coconut at home so I decided to make it with cheese.


Thanks and kudos to South Supermarket for stocking this item. Making pichi-pichi, cassava pudding, cassava suman is now possible minus the hassle of peeling and grating the cassava (which can be difficult considering the hard peel and the hefty flesh).  From the 20.00-bag you can make 20-25 pieces of pichi-pichi. Such a cheap thrill!

PICHI-PICHI WITH CHEESE

What's in it?

1 bag frozen grated cassava from South Supermarket (about 2 cups)
1 1/4 cups water
3/4 cup washed sugar*
1 tsp pandan or vanilla essence (optional)
grated cheddar cheese or grated coconut

Kitchen Conjugations:

In a bowl combine all ingredients except cheese. Stir well. Mixture will be runny. Pour into an aluminum or microwaveable tray or dish. Set aside.

Boil about 5 cups water in a pot.  When water gets to a running boil, place the dish inside the steamer.  Steam mixture for 5-10 minutes or until the mixture gels.

Remove from heat and lift by spoonfuls onto your plate of grated cheddar cheese or coconut.  Toss to coat each piece.  Serve with tea or ginger brew.  Enjoy!

===========

I prefer using washed sugar (slightly brown) because I find it more flavorful and it's being less refined than white sugar gets it more points in the health department. :)

Aug 23, 2008

Palitaw


This was one of our (me teaching my boys and two nieces) cooking projects last summer. It's pretty, easy to do, yummy, inexpensive, and the choosing of colors for the galapong makes it more interesting for kids. (Although I had to hold off requests for blue and fuschia palitaw. Hehe.)

Besides, Filipino snacks are becoming a rare species, quickly being replaced by foreign, fastfood items like french fries, pizza and waffles. I felt sad when my two sons and two nieces asked "Ano yung Palitaw?" when as children my brother and I excitedly waited for the manlalako each afternoon, excited to see which among our favorites Palitaw, Buchi, Lumpia, Cuchinta, Banana Cue, Puto, Calamay were there for the taking in his magic bilao. We had enjoyable summers putting out stands in front of our house, selling Sago't Gulaman, Kalingking, Turon and Ginataan.

So it was a MUST that I taught the kids some Filipino snacks!

BTW, Palitaw is so named because of the way each piece floats and appears (litaw) from the bottom of the pan during cooking.

Nowadays you don't need to soak glutinous rice and then bring it for grinding at the local market just to make galapong. Coconut vendors at local markets usually also sell galapong in P20.00 packs (which makes about a dozen Palitaws). Mine I bought from the vegetables section of South Supermarket, priced by weight.

PALITAW

What's In It?

    250g. Galapong

    various food coloring (optional)

    5 cups tap water

    1 coconut, meat shredded

    1/3 cup white sugar

    5-6 teaspoons sesame seeds


Kitchen Conjugations:


Toast sesame seeds in a pan over medium heat for about 2 minutes or until brown. Mix with the sugar and set aside.

Boil water in a wok or deep pan.

Meantime, if you're coloring the galapong, divide it into as many colors as you want. To each ball of galapong, pour 2-3 drops of food color (depending on how dark you want the shade to be) and work in and distribute the food color by mashing and stretching the galapong until the color is distributed.

Then cut away a small portion of the galapong (about the size of a large marble), roll into a ball then flatten into a disc. (You could have it round or oval. ) Repeat for the rest of the galapong.
Drop the flattened discs into the boiling water. Wait a few minutes for the palitaw to float to the surface of the water, then remove from the pan using a slotted spoon, onto the shredded coconut meat.

Roll / turn over the palitaw to coat both sides with the shredded coco meat. Sprinkle/top with the sugar-sesame seed mixture and serve.

Aug 9, 2008

I Heart Petite Palmiers!


Can you imagine how flaky yet crisp this is? Me I like to carefully separate the layers and slowly nibble from end to end. :) Great with Nescafe Relax. :)

Bought from S&R Alabang for P499.00. Each cookie cost about P20.00. Not bad for some instant cookie gratification. :)

In case you wanna try making your own, here's a recipe.

Aug 8, 2008

Ginataang Halo-Halo

How do you eat your Ginatan? Do you, like me, start with hurriedly eating the gabi/kamoteng kahoy, then poking at the kamote, before moving on to the langka, the sago, bilo-bilo, and then finally the saba?

Really? In that save-the-best-for-last-order too? :) Saba is my super-favorite. Promise. :)


As a little girl I used to help my lola make Ginatan, and my toka, being too young to handle knives for the slicing, was to round the galapong for bilo-bilo. Back then though the bilo-bilo we had was always white.

But not anymore, thanks to the availability and affordability of food coloring. :) Here I just divided my galapong into how many colors I wanted, poured about 3 drops of food coloring to each batch, mixed and mashed the galapong to spread the coloring and voila! Colored bilo-bilo! Nice, di ba?

GINATAANG HALO-HALO

What's In It?

6 fingers saba, peeled and sliced crosswise into rings about 1/3" thick

1 piece kamote (about 300g.), peeled and cubed

1 piece gabi or kamoteng kahoy (or both, each about 300g.), peeled and cubed

langka strips (fresh or sweetened)

200 g. galapong

1 can coconut milk + 1.5 cans of water

1/2 cup washed sugar

1 t pandan essence (optional)


Kitchen Conjugations:

In a wok or small pot heat coconut milk mixed with water over medium heat. Stir constantly with left to right motions to prevent curdling.

When milk boils, add kamoteng kahoy, gabi, kamote and saba. Simmer for 7-10 minutes or until fork-tender. Add in bilo-bilo and simmer for a minute or so, or until the bilo-bilo floats to the surface (which means it is cooked). Stir in pandan essence if using.

Tastes better at room temperature, but after all that work, I bet you'd be going for a spoonful. :)

======
Glossary:

1. Gabi - taro root

2. Kamoteng kahoy - cassava

3. Kamote - sweet potato

4. Langka - jack fruit

5. Sago - tapioca balls

6. Bilo-bilo - glutinous rice balls

7. Saba - plantain bananas

Nov 16, 2006

Buko Tarts


Out in Malabon on official business sometime last month, we were served great tasting Buko Tarts (which, we found out later, came all the way from Tagaytay). I liked it because it was not too sweet, the crust was buttery and flaky and the filling was just in the right level of creaminess. It was so good I was tempted to eat a whole serving (I meant to share the calories with my husband), savoring and complementing (or is 'compounding' the better word?) the sinfulness by gulping ice-cold Coke. Gosh. I haven't done that for ages! (Bless me father for I have sinned...)

Well, you know what happens when I get impressed with food -- I try making it myself in my kitchen. I wasted no time sending out for fresh buko, and made crust. The 'experiment' lasted less than an hour, and produced 18 buko tarts. The verdict? Jam ate three right away, despite the filling being piping hot!

Here's the recipe:

BUKO TARTS

What's In It?

Tarts
2 cups all purpose flour
1 t. salt
1/2 c butter
3 to 4 T cold water

Filling
2 cups buko meat, cut into shreds
3/4 c sugar
1/2 c evaporated milk
1/2 c cornstarch dispersed in
1/2 c buko water
a few drops of Buko Pandan flavoring (optional)

Tools/Wares Needed:
Medium sized Aluminum Puto/Tart Molds (P56.75 per 6 pieces at ValuePoint)


Kitchen Conjugations:


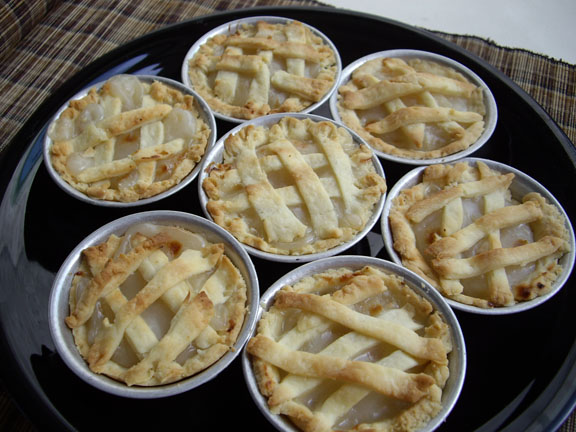
Get the butter out of the ref to soften it a bit. Set aside and start making the filling: In a medium sized pot or deep pan, combine the filling ingredients and bring to a boil over medium heat. Simmer and stir until the mixture thickens. (The best is a gluey consistency that you can still spoon. Be careful not to overcook or else the mixture will get into a paste consistency.) Remove from fire and set aside.


Work with the tarts: Combine the salt and flour in a mixing bowl. Cut the butter into cubes with a knife, then cut it into the flour-salt mixture using a pastry cutter or the tines of a fork. (The flour will combine with the butter and you're supposed to end up with a crumbly mixture.) Moisten the dough with the cold water, mix and gather into a ball. Roll out and flatten the dough with a rolling pin (or a floured wine/water bottle) to about 1/8" thick.

Cut out round pieces of the dough using egg rings (if you have), jars or round plastic wares whose mouths are bigger than the size of your tart molds. Cut the remaining dough into even-sized strips (to be used as topping later).

Lightly dust the tart molds with flour, then line each with the round dough cut-outs. Press the dough to the bottom and sides of each mold. Fill each with Buko filling then top with the dough strips, making lattices.

Bake for 5-7 minutes or until the tops turn golden brown at 200C in a Turbo Broiler. (Note: baking time is longer in a conventional oven; shorter in an oven toaster.)

Let cool before taking out of the individual molds.

Aug 13, 2006

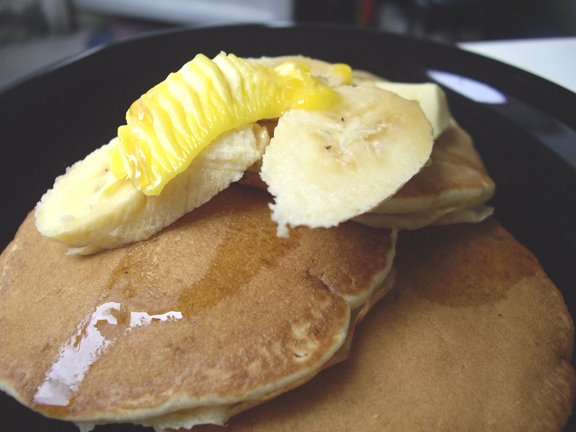
Banana Pancakes


I planned on making Banana Cake this weekend, having found Señoritas at the Carmona Public Market, but somebody ate the bananas and left me only three pieces! So I made what was left of the Señoritas into pancakes instead, to the delight of the kids in the house. :)

When I was a little girl I used to help my mom make pancakes for merienda every Saturday afternoon. Back then maple syrup was beyond our budget range and wasn't as available as it is now, so we used to top our pancakes with sugar and evaporated milk. I did the same for my pancakes today and boy, did I love it still! (Million times better than syrup!) My boys and my nieces tried their second helping of the pancakes with milk and sugar and became instant converts. :)

Here I made the batter from scratch (because I have ingredients for cake), but you can always use store-bought mixes and stir in mashed bananas. Of course, you can substitute the bananas with blueberry or strawberries, whatever have you. :) And you can always have it plain. :)

Banana Pancakes

What's in it?
  • 1-1/4 cups sifted flour
  • 2 T sugar
  • 2 eggs
  • 2 T melted shortening or oil
  • 1 T baking powder
  • 1/2 tsp salt
  • 1 cup milk
  • 2 T vanilla essence
  • three fingers Señorita bananas, peeled and mashed to a pulp


Kitchen Conjugations:

In a medium-sized bowl, beat egg, and add in milk and oil. Stir in flour, baking powder, sugar and salt. Beat until the dry ingredients have dissolves.

Stir in mashed bananas, oil and vanilla. Beat until the batter is free of lumps.

Heat a non-stick pan and pour about 1/4 cup of the batter. Flip-over when bubbles start appearing on the surface.

Top with butter, sprinkle with a little washed sugar and drizzle with evaporated milk. Top with banana slices if desired. Makes 8-10 medium pancakes.

Enjoy!

Apr 23, 2006

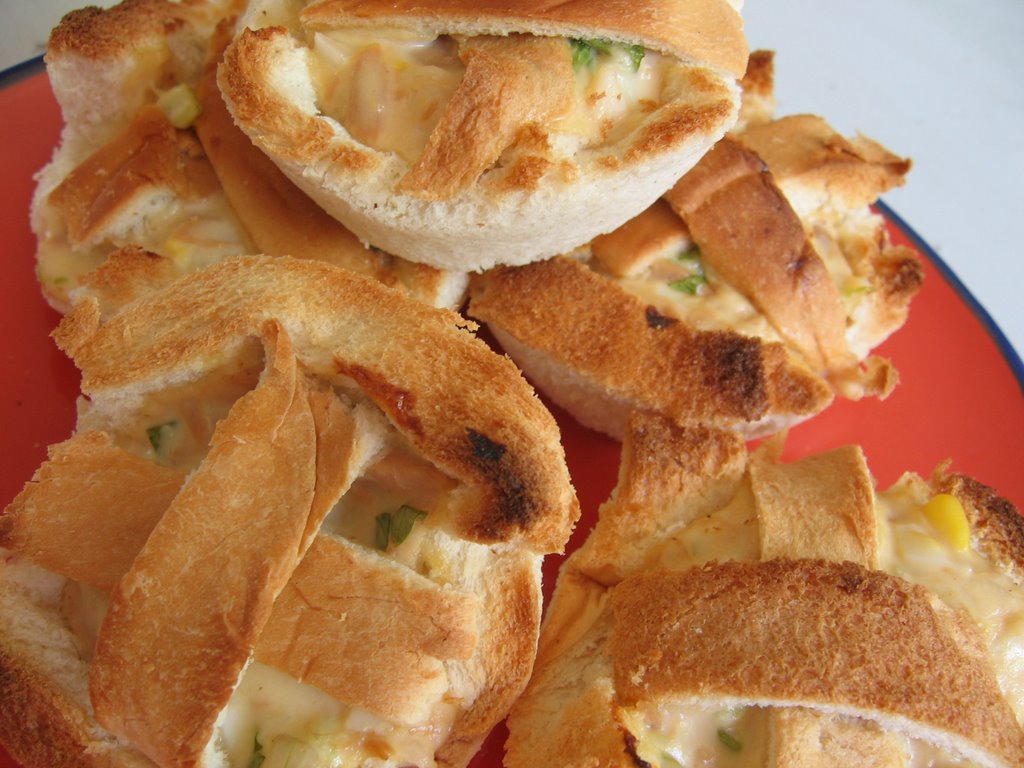
Tuna Egg Ramekins


Something that's fancy enough but quick and easy to do, to serve with coffee for when you have unannounced company, or if you, like me, have kids who clamor for something to do in the kitchen. :)

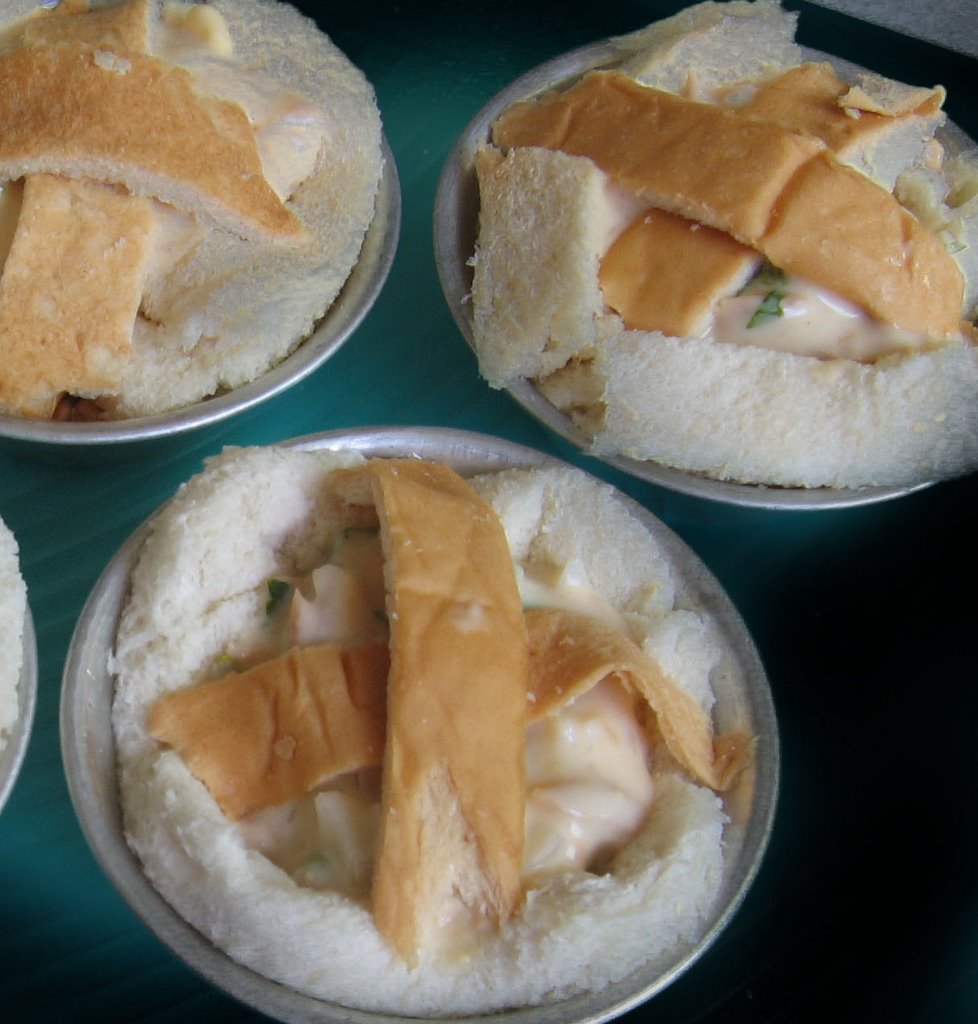
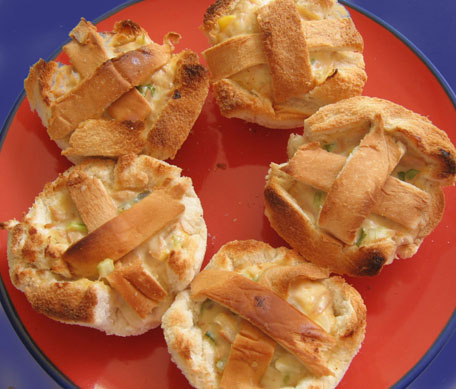
The recipe has two parts: making the Tuna-Egg Salad, and assembling the "crust." The tuna-egg salad doubles as spread for other sandwiches, or as in this recipe, can be served ramekin way.

TUNA-EGG RAMEKINS

What's In It?

  • 3 medium eggs, boiled and diced
  • 1 stalk celery, washed and diced (optional, but a quick way to sneak in some veggies!)
  • 2 cans tuna flakes in vegetable oil, drained (I use Hot and Spicy for a little kick)
  • 1 small onion, diced
  • 1.5 cups sandwich spread
  • 1/2 teaspoon salt
  • half a loaf of bread (day old is better)

Kitchen Conjugations:

Combine all ingredients (except bread) in a bowl until smooth. Set aside.

Trim sides of bread slices. Reserve the sides for later.


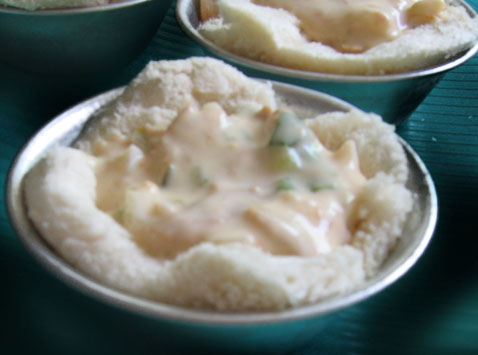
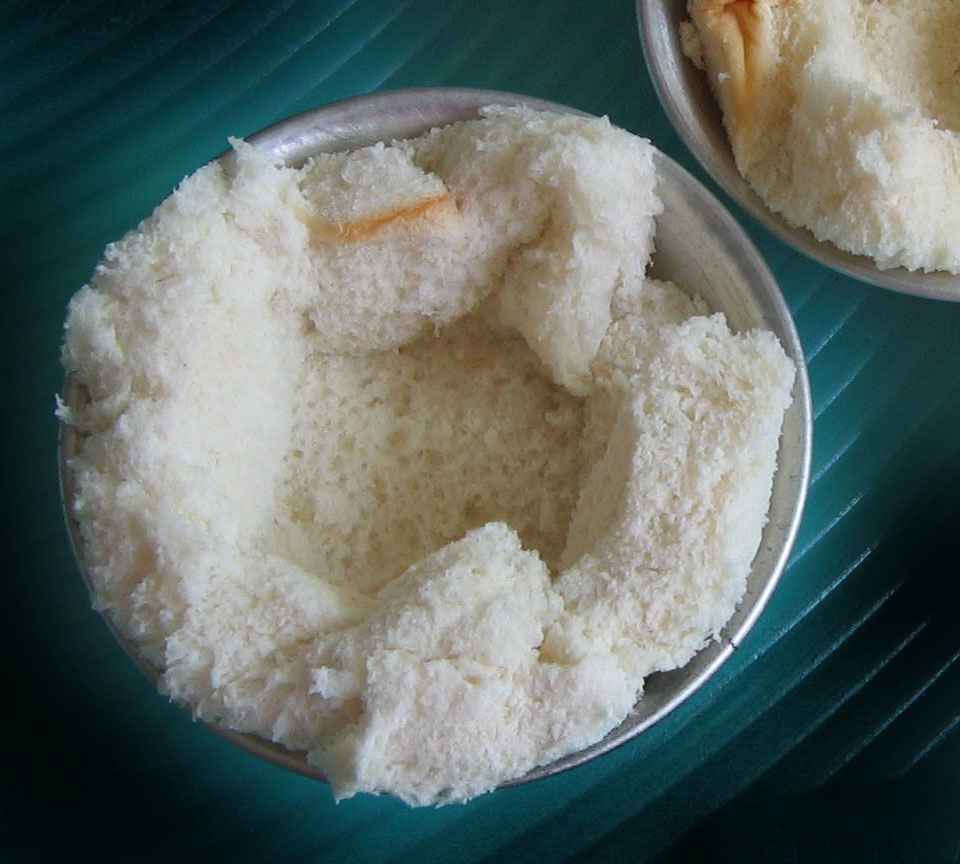
Flatten bread slices with your fingers or using a rolling pin. Press into ramekins/muffin cups. (One slice goes nicely into one ramekin.)

You may opt to toast the bread at this point, or leave the bread un-toasted then spoon-in the tuna-egg salad.

Top with the bread sides in a criss-cross fashion, then bake in an oven toaster for 5 minutes, or until the tops are golden brown.


Apr 16, 2006

Banana Cake

I haven't baked for a long while. Apart from the prohibitive costs of electricity (I use a Turbo Broiler for baking), my MBA orientation nags me to take advantage of economies of scale and just buy instead of baking my own.

Last Thursday, though, with time on our hands and a bunch of bananas rapidly ripening due to the summer heat, with the boys becoming pasaway out of having nothing better to do, I decided it was time to take out the baking arm. We had a messy time in the kitchen, with my boys elbowing each other for a turn at the mixing. Even my husband volunteered to mash the bananas. :)

This is the same recipe I've been using since I was 9, when I was initiated into baking (by good ol' mom). This too is the same recipe I've baked countless times back in highschool, the cake I've sliced and sold many mornings in junior year. :)

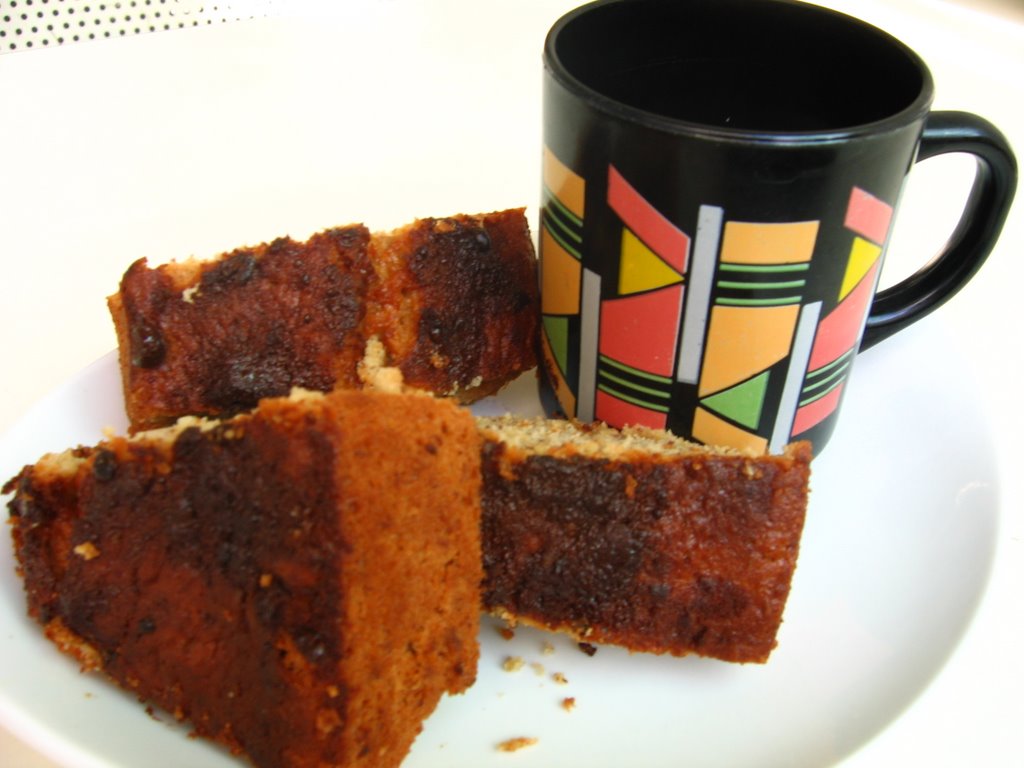
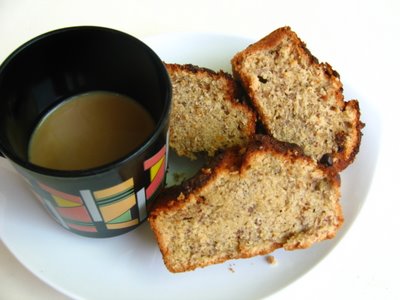
This cake is great with a cup of coffee, or a tall glass of icy orange juice.


BANANA CAKE

What's In It?

  • 1/2 c butter, room temp.*
  • 1 1/2 c sugar
  • 3 eggs
  • 1 teaspoon vanilla essence
  • 2 cups flour
  • 3 ripe bananas**, mashed to a pulp
  • 2 tablespoons buttermilk
  • 1 teaspoon baking soda

Kitchen Conjugations:

Pre-heat oven to 175 deg C. Meanwhile, stir in baking soda into buttermilk. Set aside.

Cream butter and sugar, then add eggs and vanilla. Beat for about 1 minute, then add flour and mashed bananas alternatingly. Beat with a hand mixer for 2 minutes, then stir in buttermilk-baking soda mixture.

Pour into baking pan and top with ground nuts (cashew, peanuts or almond) if desired, and bake for 20 minutes or so, or until cake starts to leave side of pan. Cake is ready if a toothpick inserted in the center comes out clean.

----

*Simply take out the butter from the ref at least 30 minutes before you start the batter to melt it to room temperature.

**I use lakatan, but when I first made this cake the practice at home was the use of senyorita (round and stubby, even smaller than latundan) and when available, bungulan (the variety that's green-peeled even when ripe). Using Senyorita made for more aromatic cakes, while the bunguran made the cake more flavorful and showy (more banana 'fibers' showing). Sadly, both varieties are not easily available now (to me, at least).

PS: The coffee mug above is at least 16 years old, something I inherited from my mom who used it every morning back when she was still in the country . It's an Arcoroc she bought during a trip to France.

Apr 3, 2006

Argellanas

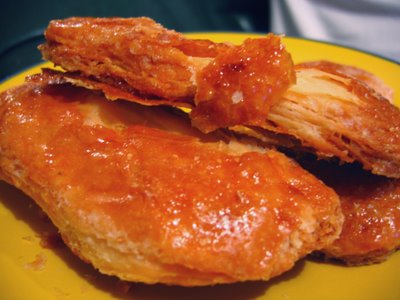
Happy to share another discovery.... Pastelera Mallorca's Argellanas... Spanish pastry that's flaky like otap, but not as hard.
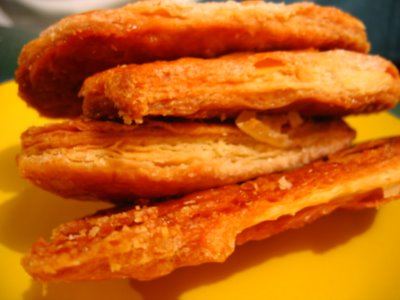
And it's glazed! The perfect cure for my brown-sugar cravings. :) Perfect for coffee, too! :)

What's more, Argellanas are not as elusive as Ginger Snaps*. They are sold in plastic jars, at the bread section of Shopwise. (I found them at the bottom shelf of the rack nearest Gardenia and the Shopwise bakery.)

I planned on having them served with coffee to guests, but I liked them so much I got greedy and kept them to myself. :P

If the Argellanas are any indication, there's lots more sinful goodies to be found in the Pastelera Mallorca (in Scout Fuentebella, Quezon City). Punta tayo? :P

---------------
PS
One of my friends actually went on a hunt for Ginger Snaps after reading my post. She scoured three supermarkets -- Shopwise, South and SaveMore, but found none. She said, "Kainis, I was looking forward to make kit-kit like a mouse while having tea!" Di bale, Jeng, try the Argellanas muna. :)

Mar 26, 2006

Ginger Snaps


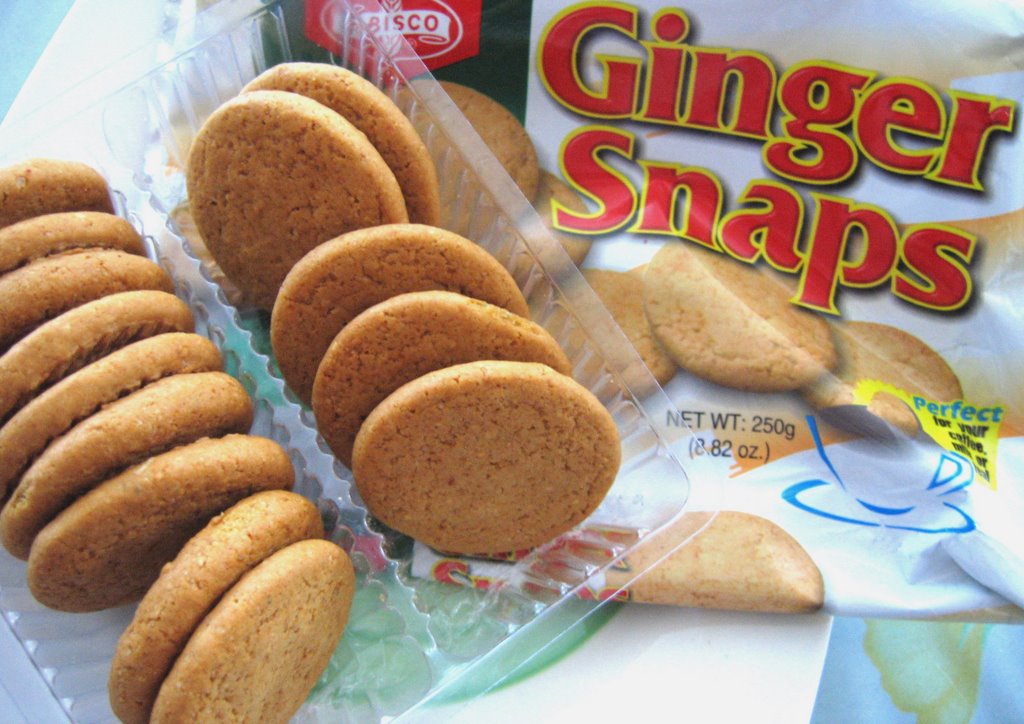
Fibisco Ginger Snaps. My all-time favorite. The day we first met in the UP Coop, Ginger Snaps cost me P18.00. From thence it has become a staple feature of my study table (well, next to the study lamp, of course) and has seen action in many dorm night studying and chattering. :)

After that love affair in college, Ginger Snaps and I went our separate ways. We did see each other in the snack aisle from time to time, but my kids wanted Oreo and Chips Ahoy and so I passed up many occasions to reconnect.

Then I noticed Ginger Snaps went 'missing' from supermarkets for a long while, and found myself actually wishing we could see each other again. So then imagine my delight when, on a chance drop-in in a hospital cafeteria (to buy a bottle of water) there it was, sitting on the shelf and gloriously calling my name. I lost no time and shelled out P40.00, almost ripped the wrapper open and took one golden brown cookie. :)

Why do I like it?

This, according to the package:

Dip it, dunk it or simply bite into it. Fibisco Ginger Snaps will surely make tea time, milk time or coffee breaks something to look forward to. Discover many ways of enjoying this classic biscuit made from an interesting blend of flavorful ingredients -- enriched wheat flour, syrup, oil of lemon, refined cane sugar and of course, ground ginger! For the gourmet in you -- Fibisco Ginger Snaps.

Plus this, according to me:

It's not as sweet (and I presume, not as fattening) as chocolate chip cookies; not as predictable as butter cookies; and definitely not as soft and crumbly as oatmeal raisin. In other words, it's in a class all its own. :)

One weekend I excitedly brought it home to share with mom as we watched TV. She took one cookie and attempted to take a bite, but the cookie 'fought back,' and she said, "Kaya pala Ginger Snaps ang tawag diyan...magsa-snap ang ipin mo sa tigas!"

Hehehe. It really would help if you soften the cookie first by dunking it in coffee, tea or juice. Back then I enjoyed it always with a glass of Tang.

Or you can nibble on the edges and let the delightful interplay of flavors from the cookie play with the tip of your tongue as the cookie slowly softens and deliciously yields to your bite. :)

Jan 1, 2006

Grilled Eggplant Sandwich


Before I married Mike I hardly treaded on vegetable territory. Wala lang, my mom just never forced us to eat vegetables.

Midway through this 10-year marriage though I found myself wanting vegetables. The first time I cooked Mike some Beef with Ampalaya, Mike exclaimed, "Himala! Uso pa pala ang himala!" His surprise is mainly due to the fact that it was I who bought the vegetables; and that I cooked them and ate them without being told. Since then I've been initiated into this acquired taste. :)

One time on a date with my 'sis' Claire, we ate at Figaro, and looking for a sandwich to balance the meaty Carbonara we were having, I saw Grilled Eggplant sandwich on the menu, and decided to give it a try. It has been my favorite since.

As you know I always try to replicate my favorite eat-out items. I served Grilled Eggplant sandwich (to complement the Penne with Mexican-Bolognese sauce) when my cousins came to visit two days ago. Here's my recipe. :)

GRILLED EGGPLANT SANDWICHES

1 large or 2 medium eggplants, washed and sliced thinly, into 3" lengths
3 T extra virgin olive oil
1/2 t iodized salt
1/2 t finely ground black pepper
1 med. red bell pepper
1 med. lettuce, shredded (salad style)
2 salad tomatoes, sliced into rings
1 med. cucumber, sliced into rings
1 med. onion, sliced into rings
cheddar cheese, sliced
1 loaf oat malt paton (or foccacia, or whichever bread you prefer)
mayonnaise
mustard

Marinate eggplant slices in olive oil, salt and pepper for at least 30 minutes. While waiting, slice bread lengthwise and then into individual slices, crosswise. Set aside. (Better to cover with cling wrap to prevent hardening.)

Grill eggplant slices and bell pepper on stovetop or charcoal grill for about 15 secs. each side.
While waiting for the rest of the eggplant slices to cook, slice the red bell pepper into thin strips.

Afterwards, assemble sandwiches: spread some mayonnaise on the bottom half of the bread, put about two or three shreds of lettuce, top with a slice of cucumber, tomato and onion and about 2 strips of bell pepper. Top with 2-3 slices of grilled eggplant (depending on the width of your bread) and a slice of cheddar cheese. Squirt a little mustard, another slice of lettuce (if desired.. you can't have too much greens!) then the other half of the bread. Pierce with cocktail toothpick to keep them together.

Makes about 15 mini (2" x 3") sandwiches. Enjoy! :)