Showing posts with label Desserts. Show all posts

Aug 18, 2014

Espasol


We had lunch in Tagaytay last Sunday and decided to make a quick stop to buy some beef at the Mahogany market.  While we waited for my husband to finish with his marketing, we were approached by some vendors who offered us an assortment of Filipino sweets -- panutsa, calamay, pinipig, ube and espasol. Because we were still busog-lusog from lunch yet I wanted to help the peddlers out, I bought a pack each of the sweets.  Then we drove on home.

So it was so much later when we found out that masarap pala 'yung nabili naming espasol and we were so bitin, and it wasn't hard for my son Gabriel to convince me to make some from the recipe I found in the 'net from a long time ago.

So, here it is!

ESPASOL

What's In It?

1 1/2 cups ground glutinous rice flour
1 cup coconut cream
3/4 cup washed sugar (segunda)
1 teaspoon vanilla extract
1/2 teaspoon fine salt
1/2 cup macapuno or buko strips, diced finely (optional)

Kitchen Conjugations:

In a wok, toast the ground glutinous rice flour until light brown over low to medium heat.  Set aside.

In another wok or pan, combine the coconut cream, sugar, vanilla extract and salt. Let boil over medium heat, stirring constantly to avoid curdling.  Add in the diced macapuno or buko strips, and simmer for half a minute (still stirring continuously).

Measure 1 cup from the ground glutinous rice flour and add it into the coconut cream mixture.  Stir to incorporate the rice flour into the mix, until the consistency is like playdough. Remove from heat and set aside.

Take the remaining ground glutinous rice flour and sprinkle it over a tray or plate lined with waxed paper (or banana leaves).  Take about 3 tablespoons of the espasol and roll it out into a tube.  Cut the espasol tube into smaller cylinders then roll them out over the toasted ground rice flour to coat.

Your espasol is now ready to serve. Enjoy!

Notes:
1. This recipe makes about 15 2-inch cylinders.
2. I made this espasol without buko or macapuno because we didn't have any in the house. It still tasted the same, although I suppose it would have been heaps better had there been macapuno or coconut bits in my espasol.
3. If using sweetened macapuno, reduce sugar a little.
4. If using white sugar, reduce the amount as it is a lot sweeter than washed or brown sugar.
5. I think you can also use toasted coconut flakes (available under the 'Buco' brand in supermarkets) in place of fresh young coconut.

Jun 29, 2012

Maja Mais

I am not sure where this dessert originated, if it's actually Filipino or Spanish. What I know is that it's such a cinch to make, and very cheap too! Great for when you're in a hurry or simply lazy, or when you've been assigned to bring dessert for potluck. :)


What's in it?

2 c thin coconut milk
3/4 c corn kernels
3/4 c washed sugar (segunda)
1/2 c cornstarch
latik or sugar toasted coconut

Kitchen Conjugations:

In a saucepan, dissolve cornstarch in coco milk.  Stir in sugar and corn kernels.  Cook mixture over medium heat, stirring continuously until thickened (but not lumpy).   Remove from fire and pour into molds.  Let cool until set.  Sprinkle latik or toasted coconut bits.

Serve with salabat or tea. Enjoy! :)

Notes:

1. Sugar toasted coconut (green pack in photo) is available in leading supermarkets. But if you have time and energy, feel free to make latik for topping! :D

2.  The original recipe for this (which I got from the cornstarch box), asks for the corn kernels to be pureed in a blender or food processor. I opted not to because doing so will turn the mixture yellow, and I like my maja white. 

Plus, skipping the step saved time, electricity, soap and water for washing the blender/food processor.

3.  I used instant gata powder for this batch (50 g), dissolved in 2 cups filtered water.

4. If you don't like corn, try using macapuno, sweetened langka or ube. :)


Dec 6, 2011

Pichi-pichi with Cheese


I found grated cassava at South Supermarket Alabang which cost only P20.00 per icebag (makes about 2 cups) and made Pichi-pichi.  I didn't have grated coconut at home so I decided to make it with cheese.


Thanks and kudos to South Supermarket for stocking this item. Making pichi-pichi, cassava pudding, cassava suman is now possible minus the hassle of peeling and grating the cassava (which can be difficult considering the hard peel and the hefty flesh).  From the 20.00-bag you can make 20-25 pieces of pichi-pichi. Such a cheap thrill!

PICHI-PICHI WITH CHEESE

What's in it?

1 bag frozen grated cassava from South Supermarket (about 2 cups)
1 1/4 cups water
3/4 cup washed sugar*
1 tsp pandan or vanilla essence (optional)
grated cheddar cheese or grated coconut

Kitchen Conjugations:

In a bowl combine all ingredients except cheese. Stir well. Mixture will be runny. Pour into an aluminum or microwaveable tray or dish. Set aside.

Boil about 5 cups water in a pot.  When water gets to a running boil, place the dish inside the steamer.  Steam mixture for 5-10 minutes or until the mixture gels.

Remove from heat and lift by spoonfuls onto your plate of grated cheddar cheese or coconut.  Toss to coat each piece.  Serve with tea or ginger brew.  Enjoy!

===========

I prefer using washed sugar (slightly brown) because I find it more flavorful and it's being less refined than white sugar gets it more points in the health department. :)

Sep 15, 2010

Minatamis na Saba


What is your comfort food?


In the 1990s, when I was still in college, my grandmother made sure she had my favorites waiting for me when I came home for the weekend.  I would always squeal in delight finding the minatamis na saba in the refrigerator, especially earmarked for me.    She always picked the Sabang Tagalog in the best level of ripeness, in vanilla-laced brown sugar syrup until they were makunat.  The best part about it is that she did it especially for me, either as a reward for good grades, or as a salve for the wounds I sustained in my love, er academic life. :)  


And that is probably why, Saba, any which way it is cooked, will always be, will forever be, my No. 1 Comfort Food.


The addition of sago in this recipe is a concession to my son, Jam, who is head over heels with sago.


MINATAMIS NA SABA


What's In It?


10 fingers Saba, peeled and sliced crosswise diagonally
1 cup brown sugar
1 cup water 
1 tsp. vanilla (optional)
1 c sago (tapioca pearls) blanched with boiling water


Kitchen Conjugations:


Combine water and brown sugar in a pot and heat to boil over medium heat.  Add in bananas and vanilla when mixture boils and turn heat down.  Allow to simmer for 5-7 minutes or until the liquid is reduced and becomes syrupy.   Add in sago and simmer for 2-3 minutes more.


Note: Do NOT boil over high heat as this will burn the sugar.  As you probably know, anything burned becomes bitter and unpleasant. :) [And I mean that both literally and figuratively!]

Aug 9, 2008

I Heart Petite Palmiers!


Can you imagine how flaky yet crisp this is? Me I like to carefully separate the layers and slowly nibble from end to end. :) Great with Nescafe Relax. :)

Bought from S&R Alabang for P499.00. Each cookie cost about P20.00. Not bad for some instant cookie gratification. :)

In case you wanna try making your own, here's a recipe.

Aug 8, 2008

Ginataang Halo-Halo

How do you eat your Ginatan? Do you, like me, start with hurriedly eating the gabi/kamoteng kahoy, then poking at the kamote, before moving on to the langka, the sago, bilo-bilo, and then finally the saba?

Really? In that save-the-best-for-last-order too? :) Saba is my super-favorite. Promise. :)


As a little girl I used to help my lola make Ginatan, and my toka, being too young to handle knives for the slicing, was to round the galapong for bilo-bilo. Back then though the bilo-bilo we had was always white.

But not anymore, thanks to the availability and affordability of food coloring. :) Here I just divided my galapong into how many colors I wanted, poured about 3 drops of food coloring to each batch, mixed and mashed the galapong to spread the coloring and voila! Colored bilo-bilo! Nice, di ba?

GINATAANG HALO-HALO

What's In It?

6 fingers saba, peeled and sliced crosswise into rings about 1/3" thick

1 piece kamote (about 300g.), peeled and cubed

1 piece gabi or kamoteng kahoy (or both, each about 300g.), peeled and cubed

langka strips (fresh or sweetened)

200 g. galapong

1 can coconut milk + 1.5 cans of water

1/2 cup washed sugar

1 t pandan essence (optional)


Kitchen Conjugations:

In a wok or small pot heat coconut milk mixed with water over medium heat. Stir constantly with left to right motions to prevent curdling.

When milk boils, add kamoteng kahoy, gabi, kamote and saba. Simmer for 7-10 minutes or until fork-tender. Add in bilo-bilo and simmer for a minute or so, or until the bilo-bilo floats to the surface (which means it is cooked). Stir in pandan essence if using.

Tastes better at room temperature, but after all that work, I bet you'd be going for a spoonful. :)

======
Glossary:

1. Gabi - taro root

2. Kamoteng kahoy - cassava

3. Kamote - sweet potato

4. Langka - jack fruit

5. Sago - tapioca balls

6. Bilo-bilo - glutinous rice balls

7. Saba - plantain bananas

Nov 16, 2006

Buko Tarts


Out in Malabon on official business sometime last month, we were served great tasting Buko Tarts (which, we found out later, came all the way from Tagaytay). I liked it because it was not too sweet, the crust was buttery and flaky and the filling was just in the right level of creaminess. It was so good I was tempted to eat a whole serving (I meant to share the calories with my husband), savoring and complementing (or is 'compounding' the better word?) the sinfulness by gulping ice-cold Coke. Gosh. I haven't done that for ages! (Bless me father for I have sinned...)

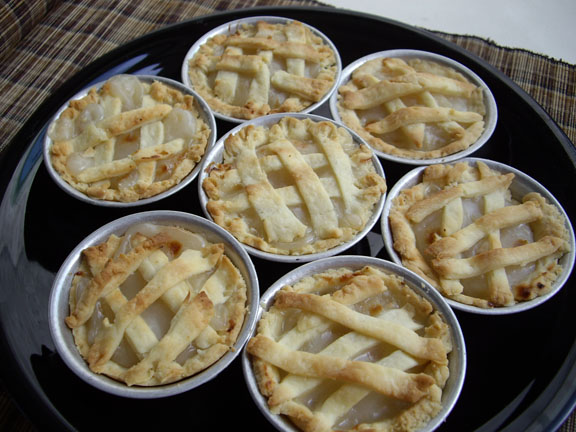
Well, you know what happens when I get impressed with food -- I try making it myself in my kitchen. I wasted no time sending out for fresh buko, and made crust. The 'experiment' lasted less than an hour, and produced 18 buko tarts. The verdict? Jam ate three right away, despite the filling being piping hot!

Here's the recipe:

BUKO TARTS

What's In It?

Tarts
2 cups all purpose flour
1 t. salt
1/2 c butter
3 to 4 T cold water

Filling
2 cups buko meat, cut into shreds
3/4 c sugar
1/2 c evaporated milk
1/2 c cornstarch dispersed in
1/2 c buko water
a few drops of Buko Pandan flavoring (optional)

Tools/Wares Needed:
Medium sized Aluminum Puto/Tart Molds (P56.75 per 6 pieces at ValuePoint)


Kitchen Conjugations:


Get the butter out of the ref to soften it a bit. Set aside and start making the filling: In a medium sized pot or deep pan, combine the filling ingredients and bring to a boil over medium heat. Simmer and stir until the mixture thickens. (The best is a gluey consistency that you can still spoon. Be careful not to overcook or else the mixture will get into a paste consistency.) Remove from fire and set aside.


Work with the tarts: Combine the salt and flour in a mixing bowl. Cut the butter into cubes with a knife, then cut it into the flour-salt mixture using a pastry cutter or the tines of a fork. (The flour will combine with the butter and you're supposed to end up with a crumbly mixture.) Moisten the dough with the cold water, mix and gather into a ball. Roll out and flatten the dough with a rolling pin (or a floured wine/water bottle) to about 1/8" thick.

Cut out round pieces of the dough using egg rings (if you have), jars or round plastic wares whose mouths are bigger than the size of your tart molds. Cut the remaining dough into even-sized strips (to be used as topping later).

Lightly dust the tart molds with flour, then line each with the round dough cut-outs. Press the dough to the bottom and sides of each mold. Fill each with Buko filling then top with the dough strips, making lattices.

Bake for 5-7 minutes or until the tops turn golden brown at 200C in a Turbo Broiler. (Note: baking time is longer in a conventional oven; shorter in an oven toaster.)

Let cool before taking out of the individual molds.

Oct 5, 2006

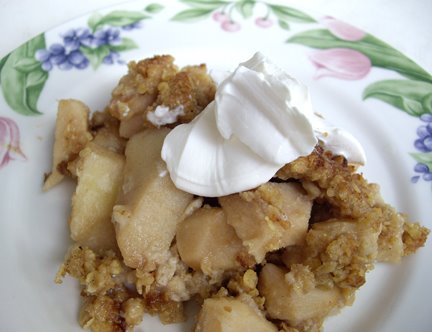
Apple Crumble

Malou cooked up a party for her husband, Lito and invited us over. I actually asked her what she wanted me to bring for dessert -- leche flan or refrigerator cake -- and she said, "Kahit ano, aprub!" But I got tied down at the office to the last minute and didn't have time to beat eggs for leche flan nor enough time to cool a ref cake so I opted for dessert that could be served warm. Incidentally, the something warm I thought of is something I've been dreaming about for months (since the time I last ate them at The Bellevue) -- Apple Crumble.

The preparation wasn't without glitches though. On the way home I was worried that I didn't have cinnamon left and was pondering substitutes -- will vanilla work as well? When I got home (45 minutes before we were due at Malou's) I ran to my pantry, found I have more than enough cinnamon, thanked God out loud, then went to work with the apples and the crumble.

Then during baking, my 10-year old Turbo Broiler conked out (the loose power plug had melted the insulation, blah-blah-blah...) and I was left with a half-baked crumble and no dessert to bring to the party. Waaahh!

Good thing the man I married is a handyman and he tweaked the wires and connected new lugs, and in ten minutes the turbo was broiling again. :) We were a little late for call time but made it to Malou's with a pan of Apple Crumble anyway, which, by the way, was wiped out at dessert time. :)

This is a good alternative to apple pie, can be made in half an hour, best served warm, with whipped cream or better yet, vanilla ice cream on top.


APPLE CRUMBLE

What's In It?

  • 5 apples ( I use Fuji)
  • 1 cup quick-cooking oats
  • 2/3 cup brown sugar
  • 1/2 cup all-purpose flour
  • 6 tbsp. butter, room temp.
  • 1 tsp. cinnamon
  • 1/4 tsp. salt
  • 1/4 tsp. allspice
  • 2 tbsp. apple juice or orange juice
Kitchen Conjugations:

1. Preheat the oven to 375 degrees. Lightly butter a 9-inch square baking pan or a casserole of the equivalent size, then dust it with flour. Peel, core and slice the apples, and arrange them in the pan.

2. In the bowl of an electric mixer, blend the oats, brown sugar, flour, butter, cinnamon, salt and allspice on low speed until it forms a coarse meal. Crumble the mixture evenly over the apple slices and sprinkle with the juice. Bake for 35 minutes (Turbo Broiler bakers: see note below).

Makes 6 servings.

I don't have a conventional oven and used a Turbo Broiler. Baking time is shorter, about 15 minutes, or until the crumble turns golden brown.

Apr 16, 2006

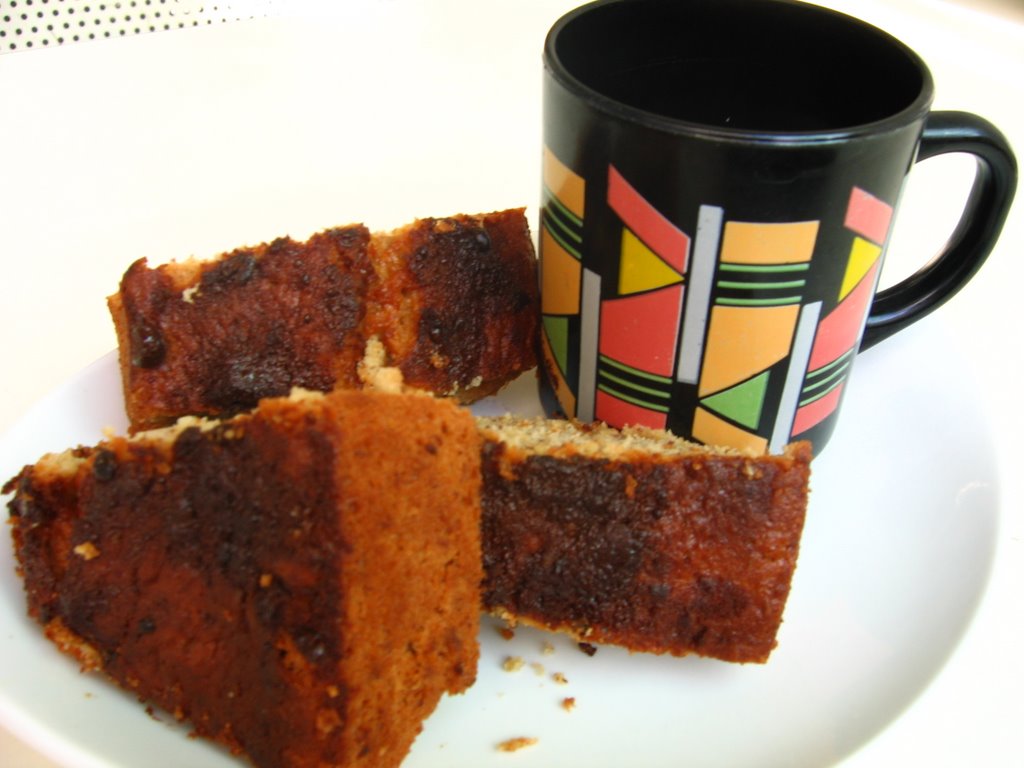
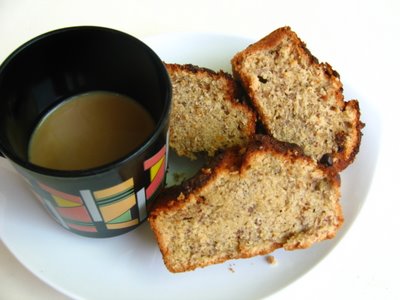
Banana Cake

I haven't baked for a long while. Apart from the prohibitive costs of electricity (I use a Turbo Broiler for baking), my MBA orientation nags me to take advantage of economies of scale and just buy instead of baking my own.

Last Thursday, though, with time on our hands and a bunch of bananas rapidly ripening due to the summer heat, with the boys becoming pasaway out of having nothing better to do, I decided it was time to take out the baking arm. We had a messy time in the kitchen, with my boys elbowing each other for a turn at the mixing. Even my husband volunteered to mash the bananas. :)

This is the same recipe I've been using since I was 9, when I was initiated into baking (by good ol' mom). This too is the same recipe I've baked countless times back in highschool, the cake I've sliced and sold many mornings in junior year. :)

This cake is great with a cup of coffee, or a tall glass of icy orange juice.


BANANA CAKE

What's In It?

  • 1/2 c butter, room temp.*
  • 1 1/2 c sugar
  • 3 eggs
  • 1 teaspoon vanilla essence
  • 2 cups flour
  • 3 ripe bananas**, mashed to a pulp
  • 2 tablespoons buttermilk
  • 1 teaspoon baking soda

Kitchen Conjugations:

Pre-heat oven to 175 deg C. Meanwhile, stir in baking soda into buttermilk. Set aside.

Cream butter and sugar, then add eggs and vanilla. Beat for about 1 minute, then add flour and mashed bananas alternatingly. Beat with a hand mixer for 2 minutes, then stir in buttermilk-baking soda mixture.

Pour into baking pan and top with ground nuts (cashew, peanuts or almond) if desired, and bake for 20 minutes or so, or until cake starts to leave side of pan. Cake is ready if a toothpick inserted in the center comes out clean.

----

*Simply take out the butter from the ref at least 30 minutes before you start the batter to melt it to room temperature.

**I use lakatan, but when I first made this cake the practice at home was the use of senyorita (round and stubby, even smaller than latundan) and when available, bungulan (the variety that's green-peeled even when ripe). Using Senyorita made for more aromatic cakes, while the bunguran made the cake more flavorful and showy (more banana 'fibers' showing). Sadly, both varieties are not easily available now (to me, at least).

PS: The coffee mug above is at least 16 years old, something I inherited from my mom who used it every morning back when she was still in the country . It's an Arcoroc she bought during a trip to France.